Backreamers are the workhorse of every HDD drilling operation. As HDD tooling experts, we see too many drillers make the mistake of trying to adapt a single reamer to every job or ground type. The fluted reamer that comes with the rig is acceptable under certain conditions. However, when using the default reamer in situations where a specialized reamer would increase production, you’ll lose time… or even a tool.
WHAT SHOULD I CONSIDER?
Choosing the wrong backreamer could slow your drilling and drag your productivity down. In a worst-case scenario, you may even lose your reamer downhole, forcing you to retrieve it...or abandon the hole altogether and start over. Also, selecting a reamer that pulls back too fast can cause road humping…and you’re on the hook to repair it. Choosing a reamer that goes too slow will get cratering with similar profit-eating implications. All these scenarios eat up time and stall your progress. Broken backreamers require the replacement of the original reamer and an investment in a reamer that is more appropriately suited for the job. To add insult to injury...you can likely plan on adding extra cost for the rushed air freight to get the reamer to your jobsite as quickly as possible. That’s a lot of cash that you could have saved if you had the proper reamer in the first place. Before you decide which reamer you need for the job, think about these factors:
WHAT ARE MY GROUND CONDITIONS?
Knowing the material you expect to encounter before you drill your pilot is optimal with all the different types of reamers. If you’re in unstable or sticky ground conditions (such as clay), you will need a reamer with excellent mixing action and enough fluid pressure to ensure the material doesn’t "ball up" or leave big chunks behind in the hole. For unstable conditions like sand that face the risk of collapse, you need to have an efficient mixing action that keeps the cuttings and the drilling fluid mixed to support the borehole wall and not allow the sand to collect on the bottom of the hole.
| Dirt | Sand | Clay | Shale | Sandstone | Hardpan | Gravel | Cobbles | Caliche | |
| Shredder Reamer | X | X | X | X | X | ||||
| Juggernaut Reamer | X | X | X | ||||||
| Ogre Reamer | X | X | X | X | X | X | |||
| Turbo Reamer | X | X | X | ||||||
| Sabertooth Reamer | X | X | X | X | X | ||||
| Hedgehog Reamer | X | X | X | X | |||||
| Tornado Reamer | X | X |
WHAT TYPE OF REAMER?
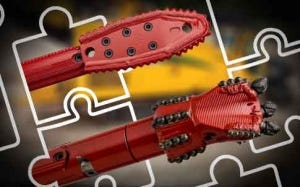
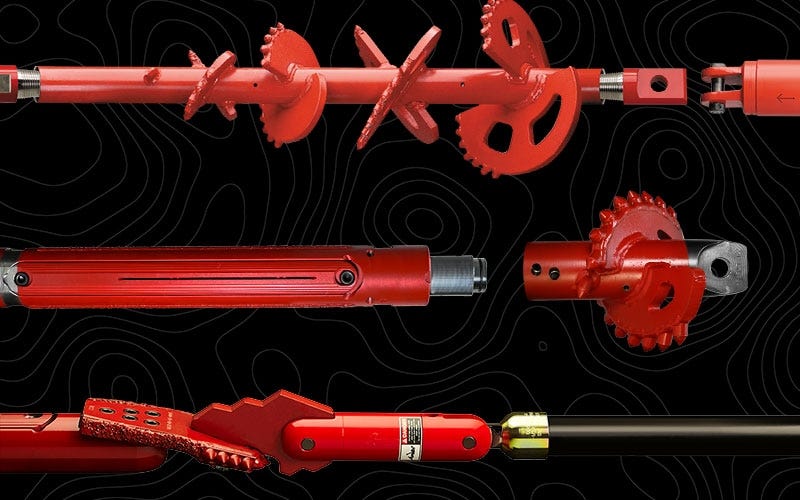
Once you know the ground conditions, you can decide what type of cutting action you need. Shale and soft limestone require backreamers with more cutters for fracturing material, then grinding it up. Softer ground such as clay or sand requires fewer cutters or you risk "balling up." Balling up happens when you have too much space between blades on your reamer, and in the wrong ground, it will compact and fill that space until you have what looks like a ball of mud instead of a reamer. Encountering harder, unstable conditions such as cobble or river rock means you don’t need to break up baseball-sized cobble as much as you need to push it out of the way. It would be best if you had a reamer with a gradual, tapered body that helps move the rocks aside rather than wastes power and material by trying to cut through them. The basic fluted or stacked plate reamer has the solid, tapered body required for peak performance in those conditions. Finally, solid rock conditions need cutting action that pulverizes the rock as it’s spinning, making small rock chips easier to pump out of the hole. Go for a tri-cone cutter or solid-style reamer to make sure you have enough force behind it to hold up. Below is a matrix that will give you some ideas on what style Melfred Borzall Reamer works best in each ground condition.
WHAT ABOUT RIG POWER?
Using an undersized tool (not the cutting diameter but the shaft it’s built on) on too powerful of a drill rig can damage the backreamer and stop your job. Choose a backreamer that is strong enough for the size of the rig you’re using. Don’t use a 20,000 lb. drill tool on a rig with 40- or 60,000 lbs. of pullback. If you must mix and match, using a big rig reamer on a smaller rig than the opposite is better.
WHAT ABOUT MUD MIX?
Always be sure you have plenty of drill fluid flow when backreaming. The pressure isn’t as important as ensuring you have enough volume passing through the shaft. If you’re not using enough fluid, you will not be able to get all the cuttings out. Pulling back too quickly without enough fluid to carry the cuttings out of your hole can push the material forward with the reamer, causing it to get stuck or create a speed bump. If you’re using a reamer meant for a small rig on a big rig, the fluid holes in the reamer could be too small—not allowing enough flow to carry your cuttings out. The opposite applies, too. Using a big reamer (with big fluid holes) on a small rig means not enough pressure, limiting your flow and causing the whole thing to ball up.
DO'S & DON'TS?
- DON’T assume one reamer is suitable for every job
- DO get a sense of the ground type you’ll run into on the job
- DON’T hesitate to stop work to swap out your reamer if ground conditions change
- DO ask your HDD supplier’s opinion before you begin the job
- DO stay open-minded about solutions. HDD tooling experts are there to help
Choosing the right backreamer before you begin a job saves time, stress, and money. If you have questions about which types of reamers are right for your job, call your local Melfred Borzall distributor to talk options. We can’t get enough of this stuff.