We created this Horizontal Directional Drilling Guide For Rookies because horizontal directional drilling (HDD) is growing through a fast expansion phase, and with the technology of HDD drilling technology today, HDD contractors are finding it harder to fill their crews with able-bodied drillers...let alone those with prior drilling experience who can prevent costly mistakes or liabilities.
This guide includes background on the HDD Industry, an overview of HDD operations, and essential knowledge for utilizing the right tools and equipment under the most common ground conditions to maximize your production and profitability. It is an abbreviation of our larger, more comprehensive, 16-page Illustrated, New Drillers, Start Here Guide that is available free to download.
A Brief History of HDD
Horizontal Directional drilling began with the principles of vertical drilling turned sideways. At first, these rudimentary practices could only complete narrow, two to three-inch diameter bores for short distances such as street-to-house installations. But as usage grew, so did the vision for what was possible.

To drill larger diameter holes, drillers developed a process to ream out the existing hole by pulling a cutting tool, or reamer, back through the original pilot bore shot. Thus enlarging tools are now called backreamers. More powerful hydraulic-powered drilling machines (rigs) were created along with cutting tools to facilitate longer and larger bores. This was when larger OEMs started to jump into the industry, and you began to see Ditch Witch® & Vermeer® rigs.
Initially, when boring capabilities were reasonably shallow, crews had to drill a series of potholes along the bore path to locate the drill rod manually along the intended route. But as location technology improved throughout the late 20th century, so did the ability for horizontal directional drillers to know the direction of the drill head without having to see it with their own eyes. Over time, this meant less excavation was needed along the bore path. Utilizing cutting-edge locating technology, the first steerable drill heads and directional drill rigs were eventually developed, enabling drillers to go deeper than ever before. Before long, contractors were crossing rivers as well as the earth.

An Overview of HDD Operations
In just a few decades, horizontal drilling went from a dozen yards of boring to drilling under rivers and entire highway systems, with minimal surface damage, sometimes for tens of thousands of feet. From then on, HDD innovation has primarily been aimed at improving the accuracy, speed, and capabilities of the entire HDD process by developing more durable equipment, better-locating technology, and specialized tools for increased efficiency and profitability.
The Equipment
Today there are five essential components of the modern horizontal directional drilling process:
- The Drill Rig: This large machine runs the entire string of connecting tooling for the jobsite operation.
- The Locating System: This ensures the drill head correctly moves along the planned bore path, preventing damage to existing underground utilities and on the way to the exit pit.
- The Drill Fluid: The “mud mix” is a complex mix of water and formulated additives that serve several vital functions depending on the soil composition.
- The HDD Vac: Evacuates excess mud so it doesn’t contaminate the area surrounding your jobsite. Vacs can also be used to create potholes along the bore path.
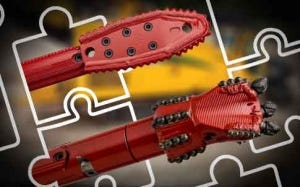
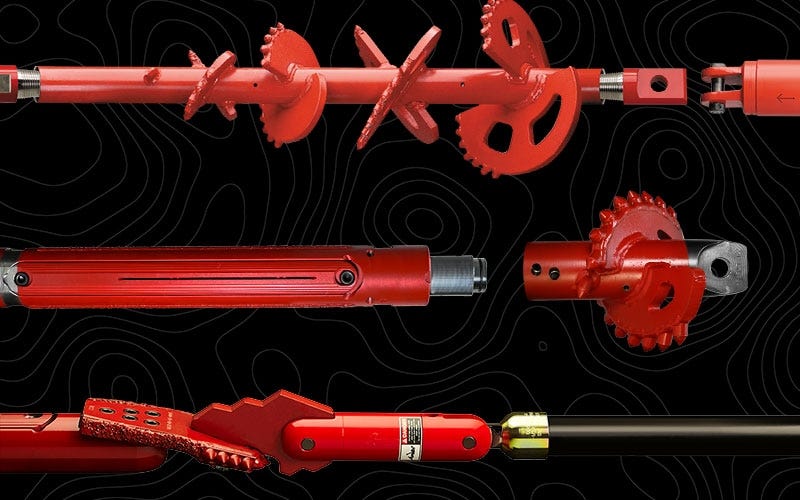
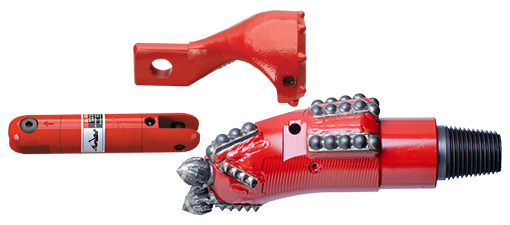
- Tooling includes all tools tailored to the job and ground conditions that take the weight of cutting through the ground. Basic tooling includes bits, blades, reamers, swivels, and transmitter housing.
Of course, you also have the product itself. Frequently it is HDPE pipe, conduit, or other product that allows underground utilities to rest safely among each other. All the other tooling listed above is to safely and efficiently locate and place new utility among existing underground infrastructure with minimal ground disruption.
The Process
Now that you know the primary function of these components, let’s look at the two main parts of the horizontal directional drilling process.
The Pilot Bore
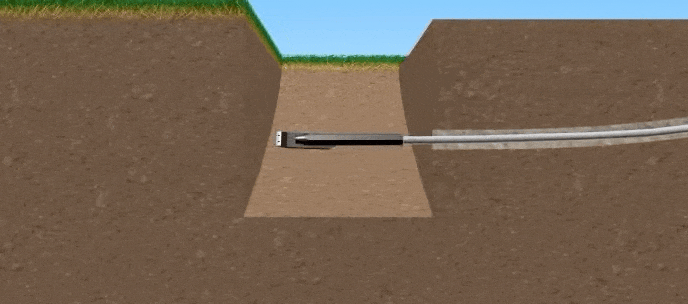
Once all the equipment is set up, and the site is ready, the first part is to create a “pilot bore,” using a cutting bit or blade between points A and B. Usually, these initial tools will bore a hole about 3- 8" in diameter. The bit follows a predetermined path, heading at an angle down to a predetermined depth starting at the intake pit and coming up at the exit pit. Sometimes the way follows the curve of a road or makes a slight turn to avoid existing underground utilities or other obstacles.
The rig operator uses the locator to steer the bit along this path. During the bore, the rig works much like a conventional drill by spinning the bit to cut a straight line through the present soil conditions. The rig operator can steer the drill head by stopping the rotation and allowing the angled face design of the directional bit or blade to push against the hard surface of the ground ahead of it, which changes its direction.
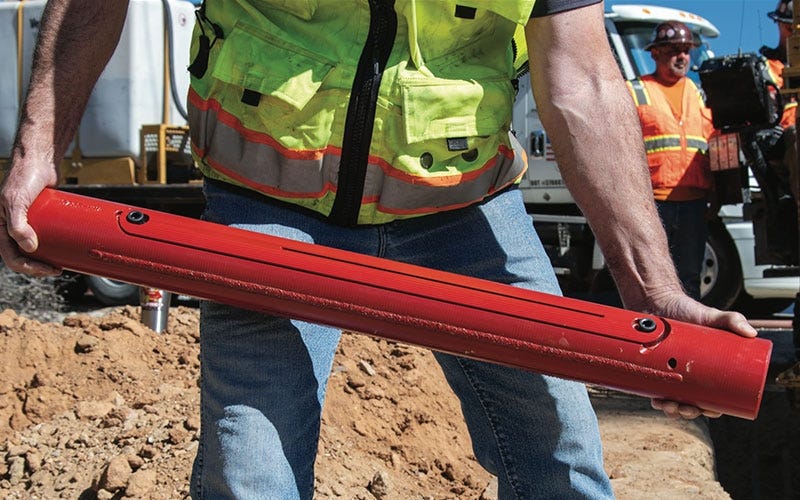
Mounted just behind the drill is a solid cylinder with a cavity inside that holds the radio transmitter. It is called the transmitter housing. This transmitter sends a signal with information downhole to a receiver carried by the locator walking at the surface along the bore path. The locator can determine all sorts of essential details on the drill head, like where the drill bit is, how deep it is, its direction, and how fast it progresses. They can also tell exactly what position that steering face is in so they can advise a change in direction as needed. The locator radios or signals this information to the rig operator allowing for necessary adjustments and “steering” along the intended path.
If the pilot bore succeeds, the drill emerges at the intended exit position, and this process step is finished.
The Pullback (direct or standard)
The second part of the process, called “pullback,” enlarges the pilot bore to a slightly larger size than the finished product pipe using a tool called the backreamer, and at the same time, pulls the product pipe through the bore where it will remain and become a valuable piece of infrastructure for years to come. Understanding the pullback process means you must first know which type of pullback the job requires.

Standard pullback is detaching the drill and the housing assembly from the starter rod or drill rod, then attaching the appropriate style and size reamer for the hole requirements. Once the reamer is connected, the product is also attached to the back of the reamer, so the product can be pulled back while the hole is being widened. This may only be accomplished in some cases, so the rig operator will first take the reamer through the hole without the product. This is called “pre-reaming.” It’s essential not to forget a swivel in this case. A swivel is then attached behind the reamer; after that, they attach the product pipe.
Direct pullback is a process that can be faster than standard reaming because there is no disconnection of the drill head, but it is only sometimes a feasible option. A direct pullback is exactly that…directly pulling back the product without a pre-ream or removing the transmitter housing. It consists of a transmitter housing with cutter blade attachments installed to “convert” it into a reamer, a swivel or pullback connector, and increased fluid-flow ports. Converting a transmitter housing into this pullback reamer is favorable for shorter, smaller bores because they save the cost of purchasing a reamer and the time spent in the pit transitioning all the connections that come with standard reamer pullbacks. But If the final hole size needs to be larger than a 12” hole, you will likely need to upgrade to a reamer for stability and the risk of excessive wear on your housing. Fiber Optic jobs and telecom contractors probably see the most benefit and use of direct pullback.
During both parts of this process, the pilot bore and pullback, drilling fluid or “mud,” is pumped through the tools into the borehole to cool the equipment, lubricate the process, carry soil cuttings out of the hole, and stabilize the borehole. Different fluid mixtures are used depending on the soil conditions and several other factors. The vac is used to suck up fluid as it exits the borehole and into a separator which separates the drilling fluid from the soil cuttings produced during the bore.
The Tools
The ground condition can complicate factors of a jobsite, and using the wrong tools for the soil condition you are dealing with can wreak havoc on the longevity of your tools and turn a profitable opportunity into an operational nightmare. There are three aspects to consider when matching the right cutting tools, i.e., your bits, blades, and reamers, to the soil type. We refer to these aspects as cut, mix, and flow.
- Cut -
The cutting action of the different tools can be compared to the teeth of a saw. Just as there are differences in the size and spacing of the teeth on a metal saw vs. a wood saw, there will be different sizes and spacing of the teeth on HDD tools depending on the nature of the soil you are cutting through. In addition to the cutting ability of the teeth, you need to consider what rotational speed of the drilling action will be best for achieving a successful bore. The general rule is to rotate the tool more slowly to cause less damage to its teeth.
- Mix -
We mentioned above that drilling fluid is specifically formulated to perform different functions during the drilling, such as keeping the bore walls stable during the drilling, keeping the fluid from draining out of the hole - for instance, when drilling through sandy conditions, cooling down the equipment, and transporting the soil cuttings out of the borehole and into the vac and separator.
This “slurry” should be like hot peanut butter in the receiving pit. The reamer you select needs to have an excellent mixing action for this process to work correctly, and different reamers work best with different kinds of fluids for the various soil conditions.
- Flow -
Since the pilot bore does not need to create as big a hole as your final hole size, the process doesn’t generate a high volume of soil cuttings. Fluid pressure is increased to help with the cutting action of the bit, but there is not as much fluid flowing downhole as the reaming process. During backreaming, these principles are reversed. A higher volume of fluid at lower pressure is needed to mix with the soil cuttings so they can flow back out of the borehole. It helps if the backreamer is designed to help "pump" the slurry out of the hole as it spins.
Tooling For Different Soils
Next, we will give you a basic overview of the most common soil conditions you’ll likely encounter during HDD drilling, which tools work best, and the common problems you try to avoid by selecting the correct tools and practices. For each type of soil, you’ll get a basic description of HDD, a list of considerations for choosing the best cutting tools, and some operational tips to keep in mind. If you are simply looking for a solution to size a reamer according to your existing job requirements, we have a great article for that.
Soft Soils
Soft soils refer to conditions like dirt or sandy loam. These soils favor HDD drilling because they are reasonably stable and don’t stick to your tools. Just about anything will work, but if the soil is too soft or boggy, you may have to go with a wider blade than average to get some steering out of it. Otherwise, expect the blade to react more slowly when making a steering push. With soft soil, like a loam, ensure the reamer you choose has a good mixing action.
Clay & Reactive Soils
Clay can be the trickiest soil type to drill into and pull back through. Clay and other soil types are considered reactive soils because their characteristics change when it is hit with water. These soils can swell up and become very sticky. A standard blade will work during the pilot bore - not much carbide protection is needed, but you need to make sure a knife is used and not a bit. Cutting won’t be very difficult, and there isn’t much wear on the equipment. The primary consideration is that the cutters may peel off big chunks of clay, so the reamer needs an excellent mixing action to blend up the clay like a smoothie. The reamer should also not have too many solid, flat surfaces for the clay to stick to. However, too many cutters on the reamer won’t work either.
Sand & Unconsolidated Soils
Sand can seem nice and soft, but it can be one of the most frustrating conditions for HDD because it doesn’t like to stay in place and can grind a bit down to a nail in a few hundred feet. Select a bit or blade with plenty of carbide cutters and hardfacing. The combination of carbide and hardfacing applied to the correct part of the bit can prevent premature wear in abrasive soil conditions. You also need lots of wear protection on the reamer you select. Preferably one that keeps the cut sand mixed up with your drill fluid and has a pumping action to keep it flowing. If the sand is idle, it will settle at the bottom of the hole.
Shale
There are a wide variety of shales; some can be hard enough to require a different approach in the tooling and processes. But most types can be fractured and broken up with the right tools. Some blades can work for shale, but a better choice is a hard soil bit with independent carbide teeth that will gouge and fracture the shale. Shale is hard and can also be abrasive, so ensure the tool's body has enough carbide protection. The cutting action on the reamer is critical here. Shale must be approached with long, aggressive teeth that can fracture the shale. But they need to be positioned so there is a gradual increase in diameter. There also needs to be a lot of teeth, so those shale fragments are busted up into smaller pieces because they still need to be floated out of the hole. If the shale chunks are too big, you'll never get them out.
Sandstone & Compact Formations
These soils can be tough to drill and steer through, but ultimately, you have created a very sound hole. You'll need a bit or blade with an aggressive cutting action when drilling and to help with carving. This will be easier than shale because you do not have to fracture and crush the shale. But you'll still need to carve for steering. And in sandstone, you'll want plenty of carbide and hardfacing protection. Choose a reamer with many carbide cutters, closely spaced, and gradually increased cut diameter. Picture this reamer like it’s a hack saw vs. a wood-cutting saw. You'll want a relatively high rotational speed for a good cut and grinding action.
Cobbles
While smaller cobbles and gravel are more manageable than large cobbles, these are difficult ground conditions to drill through. The key is to get enough of the cuttings out of the way to pull the product pipe back through a clean hole. These drills move more slowly than other soil conditions and will likely ruin a few tools. You don’t drill directly through a cobble. You need a solidly built bit with lots of wear protection to hold up through the cobbles. The front of the bit must help roll the cobbles out of the way and compress them into the borehole wall to get the bit and drill pipe. Choosing a solid-built reamer with lots of short carbide cutters is essential to ream the hole without ruining the reamer. Ideally, choose a reamer with carbides that are conical or even dome-shaped to minimize carbide breaking. Flutes in the reamers help allow some cobbles to pass by the reamer and out the hole.
Conclusion
Now that you have a high-level understanding of the basic principles of HDD, we suggest you visit our website and look at some of our most popular HDD solutions. The perfect tool for your next HDD job may be waiting for you to find it. If you want a deeper dive into HDD operations & fundamentals, we have our “New Drillers Start Here” 16-page guide that elaborates on much of the above content. Access that by entering your information below.
Melfred Borzall has been a founding member of the HDD industry and an innovative manufacturer since its development almost 80 years ago. We continue to support drillers through education and the high-quality standards in all the tooling we offer.